
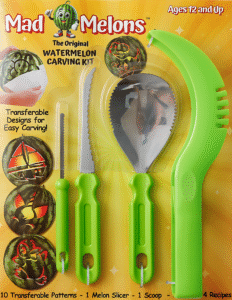
If you’ve ever wondered exactly how to carve a watermelon for kids, the Mad Melons Original Watermelon Carving Kit makes it surprisingly easy. Designed for hands-on summer fun, this all-in-one kit includes everything you need—from kid-safe tools to peel-and-stick designs that guide each cut. It takes the guesswork out of carving so your kids can dive right in and create something they’ll be proud of.
Watermelon carving is a surprisingly awesome way to get kids off screens and into something tactile, silly, and totally summer. Whether you’re planning a backyard party, hosting cousins for the weekend, or just looking for something fresh to do on a hot afternoon, this activity delivers. The Mad Melons kit takes all the guesswork out of it—no fancy tools, no complicated stencils, just peel, stick, scoop, and carve.
It’s creative, it’s kid-friendly, and best of all—it ends with juicy watermelon chunks you can snack on, freeze, or turn into popsicles. Even the cleanup is simple if you follow the prep tips. Whether it’s your first time carving or a new summer tradition, this activity hits the sweet spot between fun and functional.
Before you get started, here’s a quick checklist to make setup smooth and stress-free.
Everything you need is included in the Mad Melons Original Watermelon Carving Kit, plus just a couple of extras for setup and storage:
Now that you’re set up, you’re ready to carve! Follow these simple steps from start to finish.
Start by picking a design from the booklet included in your carving kit. Use scissors to cut around the image, leaving a small border all the way around.
Tip: The design will be reversed once it’s applied—so if it includes words or direction-specific shapes, keep that in mind when choosing and placing it.
Decide how you want the watermelon to sit—standing upright or laying on its side—based on your chosen design.
Optional for younger kids or party displays: Skip the cutting and go straight to steps 6 and 7. Applying a design to an uncut melon makes a great centerpiece and adds festive flair before slicing it up later.
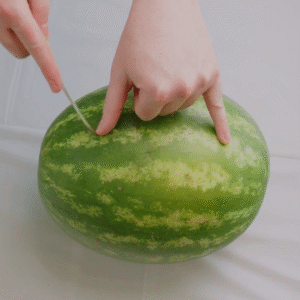
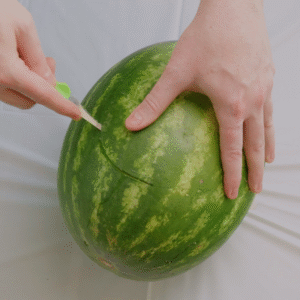
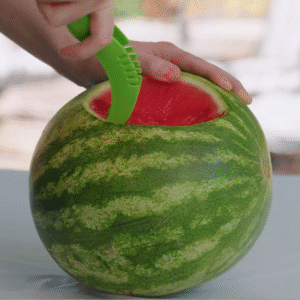
Use the slicing tool from your kit to lightly score an oval about the size of your hand on the top of the watermelon. This will be your guide. Then, insert the larger saw tool at a slight angle and carefully cut along the scored line to create a removable lid.
Tip: Cutting at an inward angle helps the lid rest securely when replaced.
Use the melon slicer tool to crosscut the inside of the watermelon, creating large cubes. Scoop them into a bowl and save for snacks, smoothies, or popsicles.
Tip: Place a towel or baking sheet underneath to catch juice and keep things tidy.
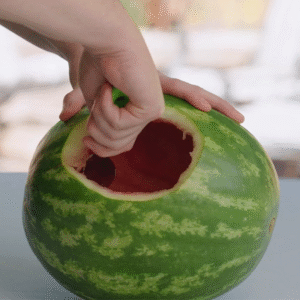
Use the scraper tool to gently remove any remaining fruit from the inside of the rind. You can leave some red for a glowing effect or scrape down to the white rind for more contrast.
Tip: Don’t scrape too much—leaving some thickness helps the melon stay sturdy. Blot with a paper towel to remove extra juice before applying your design.
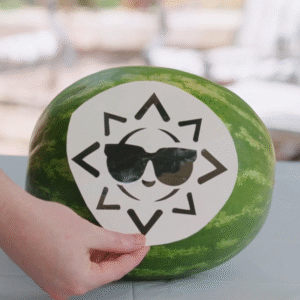
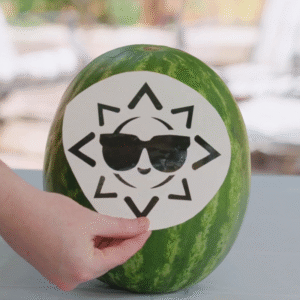
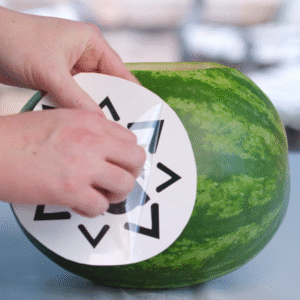
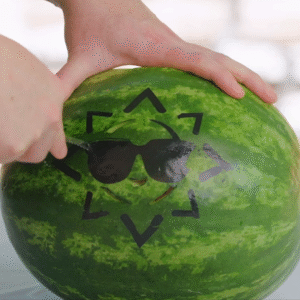
Peel off the clear top sheet from your design and place it face down where you want to carve. Press it firmly so it lays flat.
Tip: Choose a clean, dry area of the rind for best results. Double-check the placement before moving to the next step.
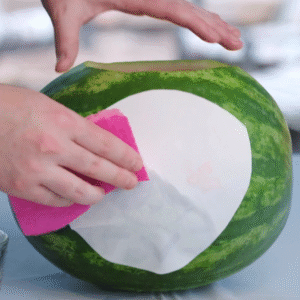
Use a damp sponge or paper towel to press and wet the back of the design paper, starting from the center. Once fully saturated, slowly peel the paper away to reveal the design.
Tip: If any part doesn’t transfer, lay the paper back down and apply more moisture.

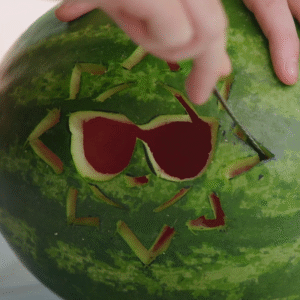
Use the small saw tool to carve along the black outlines. Start with the detailed areas in the center and work outward.
Tip: Take your time and use gentle sawing motions. Removing small sections gradually helps keep the design clean and precise.
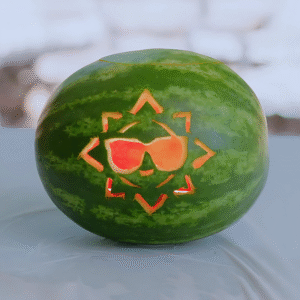
Use a damp sponge to wipe away any leftover ink from the transferred design, then pat dry with a paper towel.
Tip: This makes the carved lines look crisp and clean—especially when lit from inside.
Place a battery-powered tea light or LED inside the hollow melon. Replace the lid and admire your glowing creation!
Tip: Avoid real candles. Battery-powered lights are safer and work great—especially for kids and nighttime displays.
Got questions? Here are some of the most common things people ask before (and after) they carve.
A carved watermelon will hold up for about 3 to 5 days at room temperature, similar to a carved pumpkin. If you’re making it ahead of time for a party, just store it in the refrigerator until you’re ready to bring it out. It will look its best within the first day or two, but it can easily last through your event if kept cool and out of direct sunlight.
The chunks you scoop out during carving can be stored in the fridge for 3 to 4 days, or frozen for up to 3 months. They’re perfect for smoothies, popsicles, fruit salads, or just easy summer snacking. Seal them in airtight containers or zip-top bags to keep them fresh.
Yes! For younger kids or a simple centerpiece, you can skip the cutting entirely. Just apply a peel-and-stick design to an uncut melon. It’s a fun, festive way to dress up a watermelon for a day or two before slicing it up for dessert.
Nope! The Mad Melons Original Watermelon Carving Kit includes everything you need: kid-safe carving tools, a scoop, and peel-and-stick transferable designs. The only thing you’ll need to provide is a damp sponge or paper towel to help transfer the design onto the melon.
Use a battery-powered tea light or LED—something small, flameless, and safe for kids. These give off a soft glow that shines through the carved design without any heat or mess.
Absolutely. You’ll scoop out plenty of fresh chunks during the carving process, and none of it goes to waste. Save the pieces in the fridge or freezer and use them for snacks, smoothies, or your favorite summer recipes. Check out our recipe ideas here.
You’re all set! Now it’s time to grab your kit and start carving.
Whether you’re planning a summer party, looking for a creative screen-free activity, or just want to try something new with your kids, the Mad Melons Original Watermelon Carving Kit makes it easy and fun. It includes everything you need to get started—no experience required.